Standard look of Samsung Live Wallpaper software


Despite what the name 'Animated Wallpaper' implies, it's just basically "Set this image at this time of day" wallpapers.


They seems to be consisted with one json & multiple images.


..AppData\Local\Packages\Sidia.LiveWallpaper_wkpx6gdq8qyz8\LiveWallpaperData\AnimatedWallpaperPackages
├ BASW-A2867A06
│ ├ .patches
│ │ ├ .unfinished (empty file)
│ │ ├ BASW-A2867A06.zip (contains images and images.json)
│ │ ├ *images
│ │ └ images.json
│ │
│ └ .thumbnails
│   ├ *images
│   └ thumbs.json (same as .patches/images.json)
└ ...


and their json file specifing when those image should be showing up, or should weather effect rendered, etc.


[
    {
        "ID": "image name",
        "Weather": [
            "All"
        ],
        "ApplyEffect": true,
        "ApplyMessage": false,
        "sequence": 0,
        "timeOfDay": "Sunrise"
    },
    ...
]


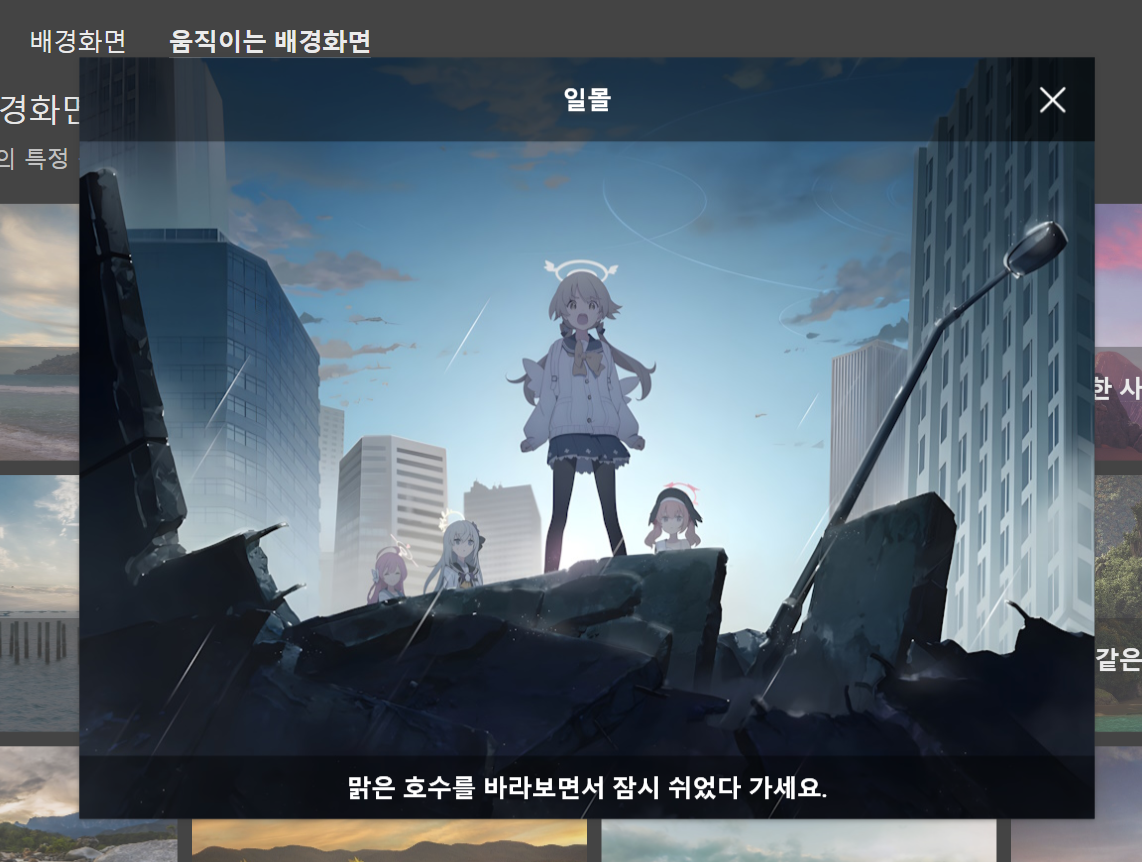
Since we have amazing background just for this timely stuff - Blue Archive's 'Our Story' scene where day brightens as dialog progresses.


I tried overwriting dynamic wallpaper as any sane person would do.


Sunrise,  Sunset as 'Climax' / Day as 'Story' / Night as 'Exposition'


And it seems to work at first:


But no, it doesn't apply - whenever you change to other wallpaper and back, this downloads .patches directory contents again(not sure it's just when background hash is wrong, idk), so this only works for thumbnails so far.


Database Live Wallpaper uses for downloading & placement of each wallpaper packages

Fiddling db and various json config files do stops redownloading and removing our 'invalid' data, but still it's not setting background as we wanted, just showing trees and lakes it originally had. 


So far what I can tell is:

  • Editing db's image count don't work
  • Editing ./Temporary/CachedCurrentAnimatedCategory.json to point our new wallpaper images doesn't work

I wonder if I can get help from samsung members about this.

졸프가 붙었나 안붙었나 알아보려 에타 갔다가 본 질문글이 있어서, 생각을 정리해본 글

제목을 복합 바인딩이란 이름으로 하려다, 검색도 안될까봐 그냥 복합할당으로 변경.

질문

>>> def f1():
>>> def func1():
...     a.append(4)

>>> def func2():
...     a += [4]

>>> a = [1, 2, 3]
>>> func1()
>>> func2() # Error

왜 같은 기능인데 func2는 오류인가?


답변

간단한 해결은 global 이나 nonlocal 사용하는것. 용어는 변수가 아니라 이름, 할당이 아니라 바인딩을 쓸건데 이는 후술.

>>> def f2():
...     global a
...     a += [4]

만약 글로벌 네임스페이스에 있는게 아니라면 대신 nonlocal 을 사용해서 쓰는 이름이 로컬 네임스페이스에 있는게 아님을 명시

>>> def some_other_func():
...     a = []
...     def f2():
...         nonlocal a
...         a += [4]
...     f2()

왜 이런 구조인지에 대한 개인적 추측으론, 파이썬 철학때문이라 생각함. import this 했을때 나오는 파이썬 철학중 4개 줄들을 보면

  • "Explicit is better than implicit"
    • "명시적인게 암묵적인것보다 좋다"
  • "Readability counts"
    • "가독성은 중요하다"
  • "Errors should never pass silently / Unless explicitly silenced"
    • "오류는 명시적으로 묵살하지 않은 한 절대 조용히 넘어가선 안된다."
  • "In te face of ambiguity, refuse the temptation to guess"
    • "모호한 상황에서 굳이 추측하지 마라"

파이썬은 그 누가봐도 이해하기 쉬운 코드를 지향한다는 걸 알수 있음. 가독성과 모호함은 파이썬에서 절대적으로 있어서 안될 요소인 셈.


예제의 a = a + [4] 또는 a += [4] 를 할 때, 같은 = 연산자인데 a가 글로벌인지, 로컬인지, 상위 네임스페이스 어딘가에 있는지에 따라 암묵적으로 저장하는 위치가 달라진다면?


그럼 결국 코드만 봤을땐 로컬부터 글로벌까지 상위 네임스페이스 전체를 다 읽어보기 전에는 이 a가 어느 네임스페이스에 있는 걸 가져다 어디 바인딩 했는지 알수가 없다. 즉 모호하다.


때문에 global x, ynonlocal x, y 같이 명시적으로 "앞으로 이 네임스페이스에서 x, y 를 참조할건데, 이는 현 네임스페이스 외부의 x, y임을 지칭한다" 라고 선언해 주는 게 아닌가 생각함.


기타

나머지 도움될지도 모르는 내용을 좀 더 덧붙이자면, 일단 파이썬에서 변수(variable)와 할당(assigment)란 용어를 쓰는거 자체가 논리적으로는 틀림.


파이썬에서 보다 더 정확한 용어는 이름(name)바인딩(binding) 인데, 이는 파이썬 특징에서 비롯함. 아래 예제를 예로 들면:

>>> a = []
>>> b = a
>>> a is b
True
>>> id(a)
2465394964480
>>> id(b)
2465394964480

a, b가 변수 였다면 = 연산자 결과로 C언어처럼 b라는 변수에도 또다른 메모리 공간이 할당되어야 했겠지만, id(x)로 본 a & b 의 메모리 주소가 동일함. (CPython 기준, 구현체마다 주는게 다름)


실제로 파이썬은 오히려 call by reference와 유사하게 동작함(구체적으론 call by sharing 이라고 함). 그래서 a = [] 연산자의 동작은 메모리상의 [] 객체에 a라는 포스트잇을 붙이는 것에 가까움.


그렇기 때문에 b = a 를 할때 a라 써진 포스트잇이 붙은 객체에 b라 써진 포스트잇이 하나 더 붙는 셈. 그래서 b.append(1) 을 하면 a에도 같은 값이 들어가 있는 것. 동일한 객체니까.

>>> b.append(1)
>>> a
[1]
>>> b
[1]


결국 이름을 객체에 붙이고 떼는 행위이기 때문에 변수라기보단 이름, 할당이라기보단 바인딩이 정확하다는 것.


그러면 "a = 1 은 뭔데? 1도 객체냐?" 할수 있는데. 객체 맞음. 파이썬은 int boolean같은 기초 자료형까지 모든게 객체인 진정한 객체지향 언어임.

>>> isinstance(1, object)
True
>>> isinstance(True, object)
True

그렇다고 변수와 할당이란 표현이 볼드모트 취급인건 아니라, 타 언어를 쓰는 사람과의 의미전달에도 문제가 없기 때문에 파이썬 공식문서도 두 용어를 사용하고 있음.


당장 위 예제 돌리면 나오는 UnboundLocalError 도 바인딩 표현. 스택오버플로 참조


추가로, x = x + 1 하는 것과 x += 1 하는 것의 의미가 미묘하게 다름. 파이썬 공식문서에서 증분 대입문(Augmented assignment statements)에 따르면 - 후자는 "객체가 지원을 한다면 연산을 통해 객체를 새로 만들어 바인딩하는게 아니라 이미 바인딩된 객체에 in-place 연산을 수행해라" 라는 의미.

This post is quite a much based on following video - except we aren't using UTS2.


Here, we'll use Unity Toon Shader(UTS) which is a successor to UTS2(Unity-Chan Toon Shader 2).


Original UTS stands for Unity-Chan Toon shader, but now it doesn't have '-Chan' in it's name.

This post will use term UTS3 to refer Unity Toon Shader in order to clear up confusion.


This new shader supports both standard and SRP - suitable for modern unity developments.


If you don't have specific preference between old Unity-Chan and new Unity-Chan - you can ignore this post and go for new one, which supports URP out-of-box using UTS3.


This post will only focus on importing and converting old Unity-Chan in URP, but process shouldn't be different in HDRP.


Prep 0. Expectation

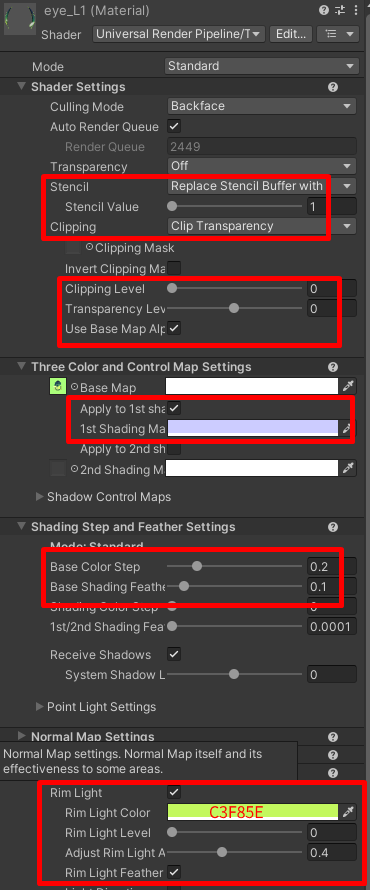
In Unity 2019, with default 3D pipeline. Light color is FFF4D6

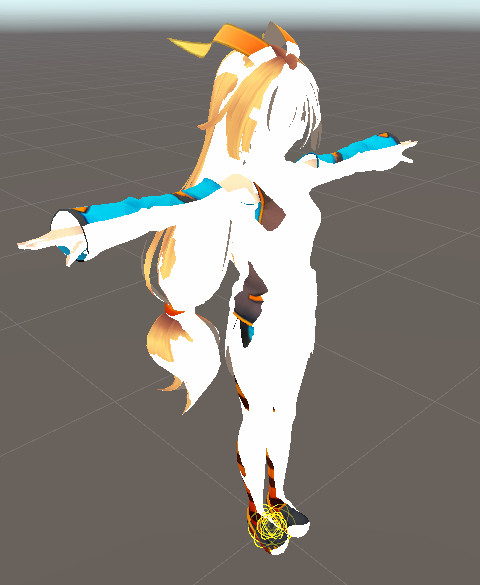
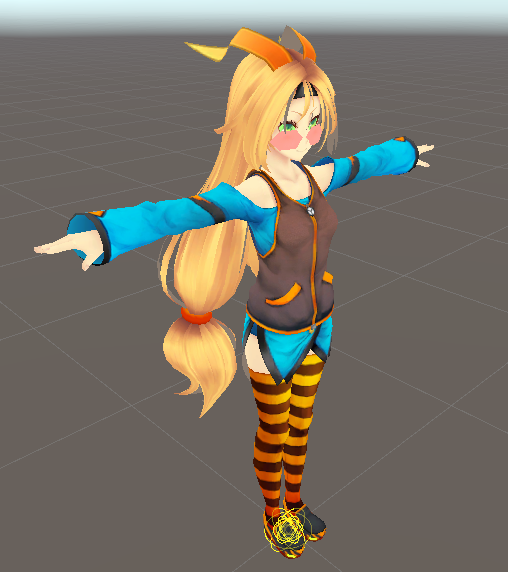
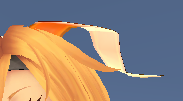
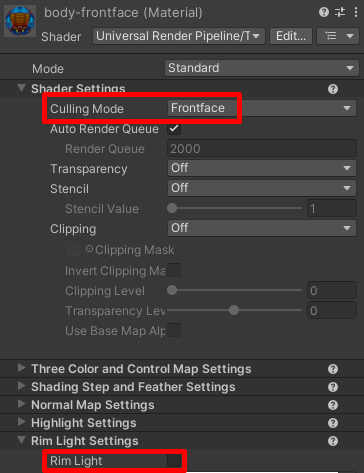
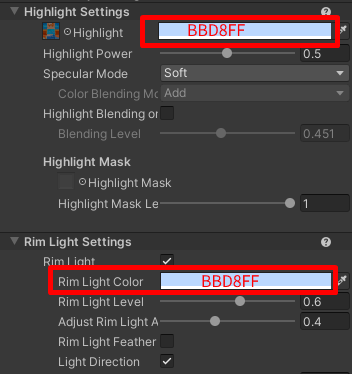
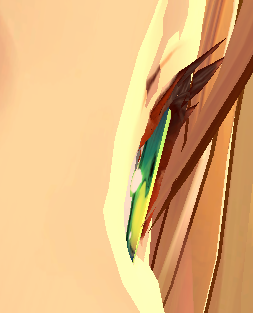
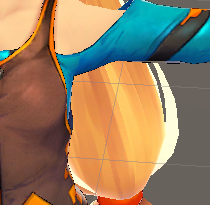
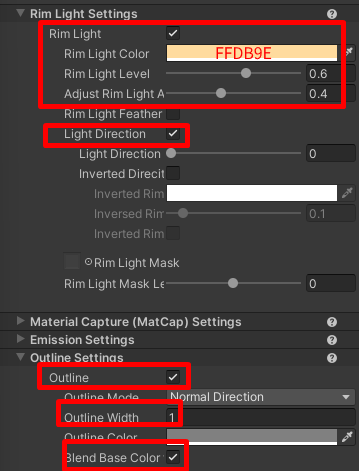
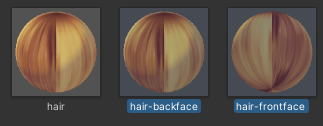
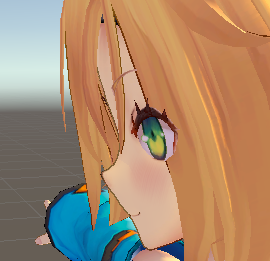
Do note, that it looks almost impossible to get the original feeling of Unity-Chan's shiny and colorful Rim Light and Specular Highlight.


That is, even if we here see her having Blue Rim Light and Orange Rim Light depending on base color Rim Light is on, but it's impossible with UTS3 - there's no setting like that.


I spent multiple full days but couldn't find any proper conversion methods for that in any of documentations.

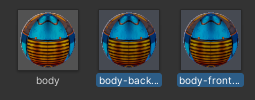
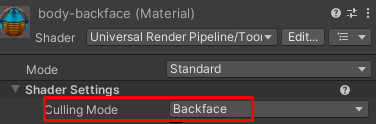
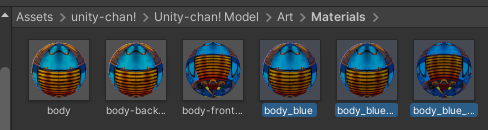
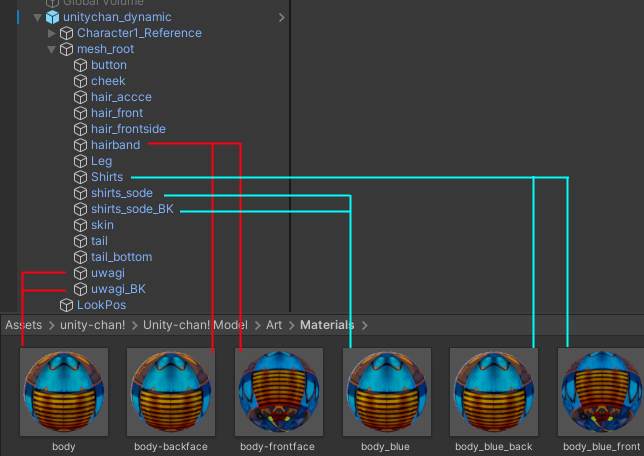
Best bet is just to split single material to have different Rim Light / Highlight settings per mesh - which is explained below.


Prep 1. Creating Project

Anything 3D is fine, thought there may be difference in supported features they say. I'm going for URP.


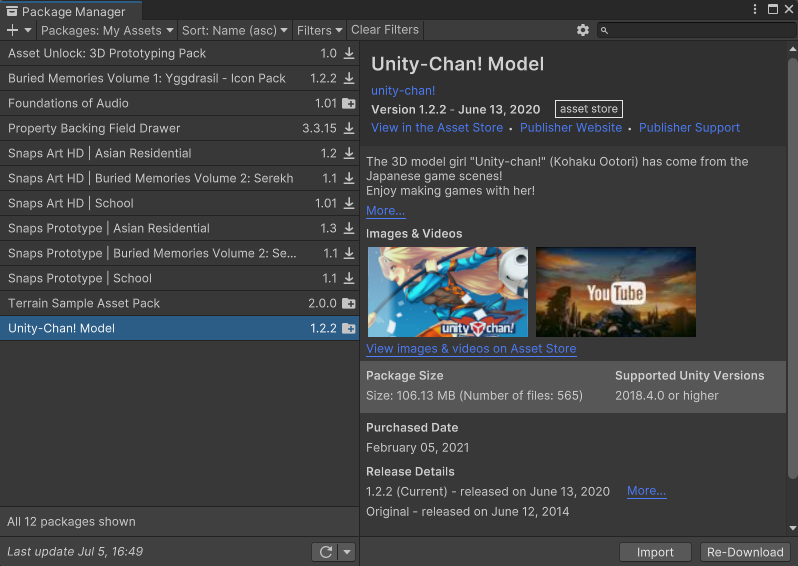
Prep 2. Adding Unity-Chan

Get Unity-Chan from official Unity-Chan site, or Asset Store. I'm lazy so I'm getting one from Asset Store.


Either way, make sure to read the Unity-Chan license. It comes with custom license.
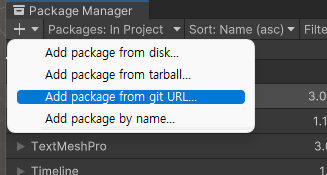
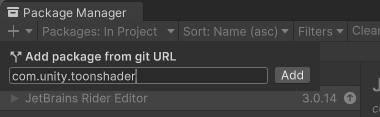


Prep 3. Adding UTS3

Add package from git URL > com.unity.toonshader > Add

Few errors might come up - but safe to ignore, probably HDRP compiles failing in URP, and vise versa. UTS3 has both.


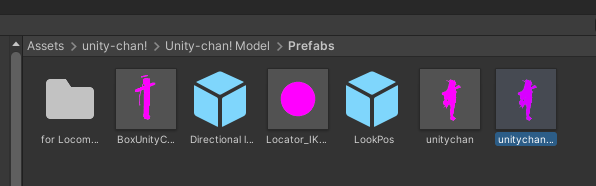
Prep 4. Bring out Unity-Chan prefab

Location might slightly differs depending on where you downloaded it.


Drag either unitychan prefab or one with dynamic to the scene.

Only difference is whether she have spring bones, wind and blinking scripts or not.

You can just work on the prefab editor but I prefer it under scene lighting.


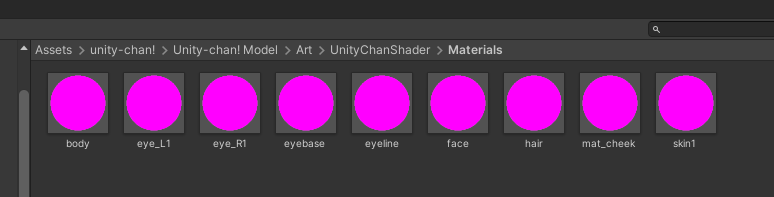
Prep 5. Locate model materials

Do note that depending on which way you installed the Unity-Chan, folder structure is different.

Translate Path accordingly. (For i.e. Art folder -> Model folder)


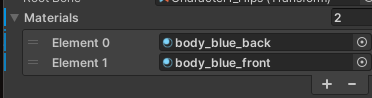
There's Materials that's directly used by Unity-Chan prefabs in Art > Materials.

(Not materials inside shader folder)

We'll just call this 'Model materials' to distinguish with similar materials in shader's folder.


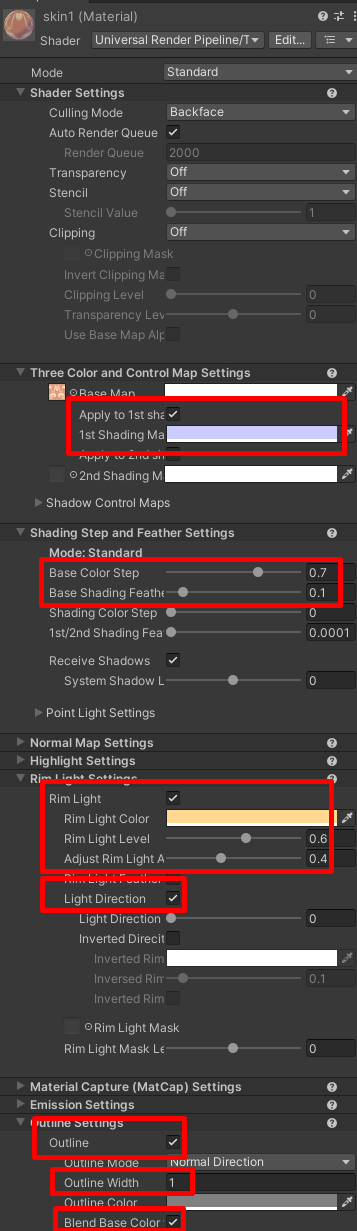
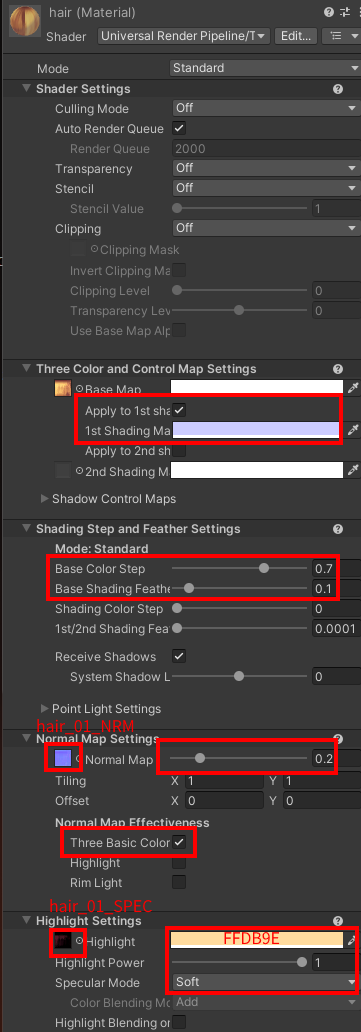
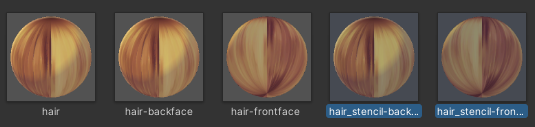
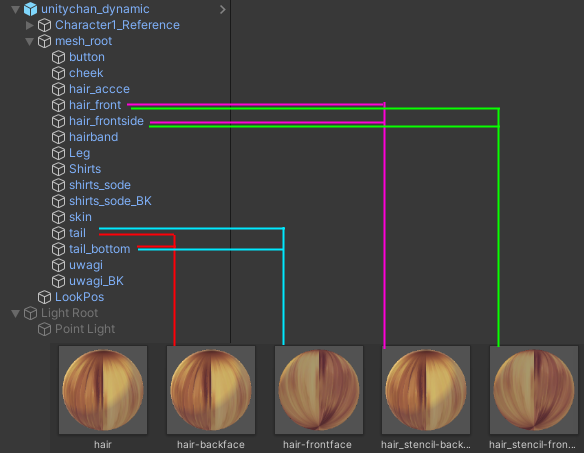
Prep 6. Conversion Logic

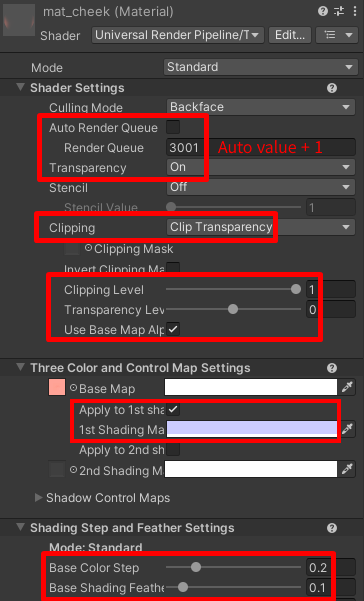
When we check materials inside Art > UnityChanShader, you'll see there's similar materials, but not directly used by prefabs or models.


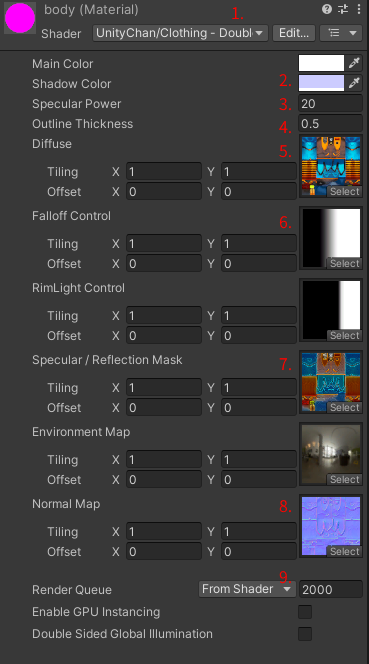
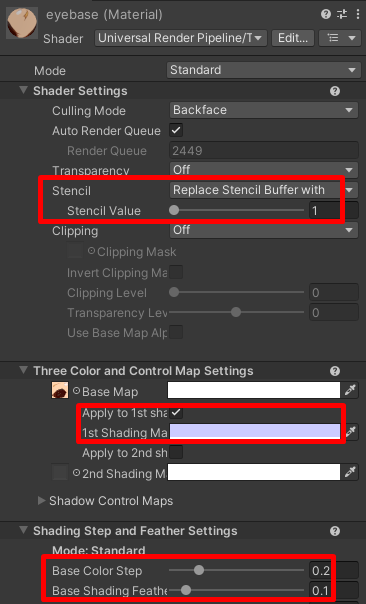
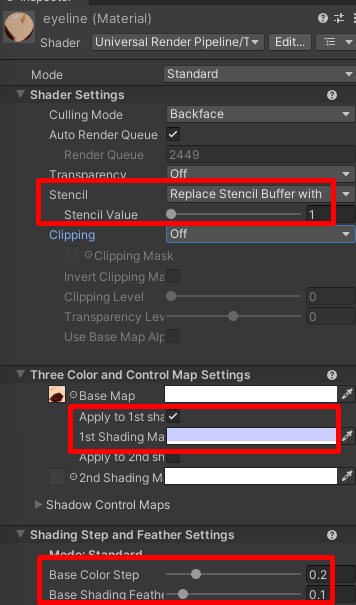
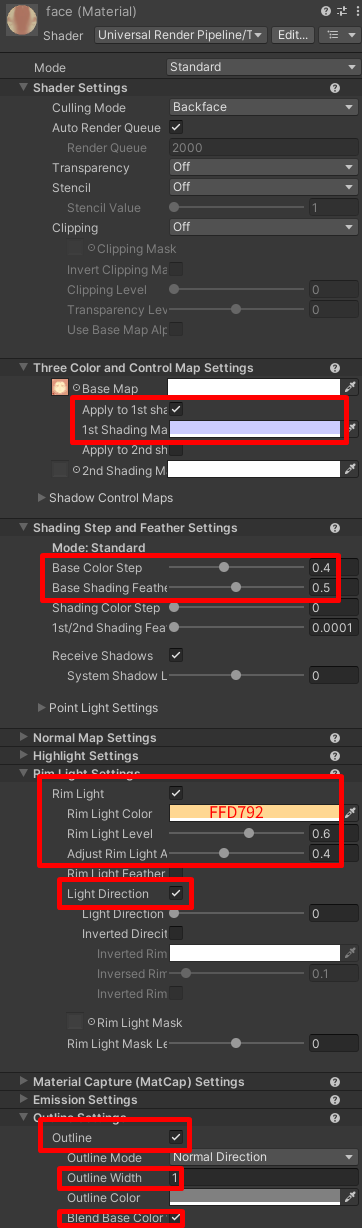
These still carries the original shader data like below.

Reference of original data - Ignore numbers, quite pointless

WIth this information, we'll 'try' to mimic it as much as we can.

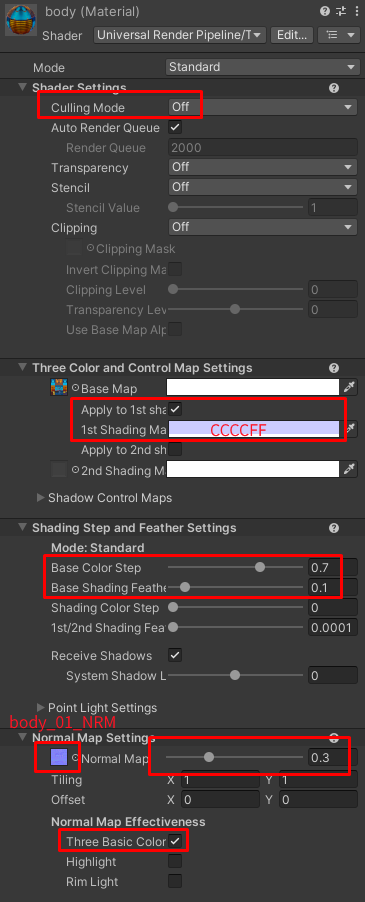
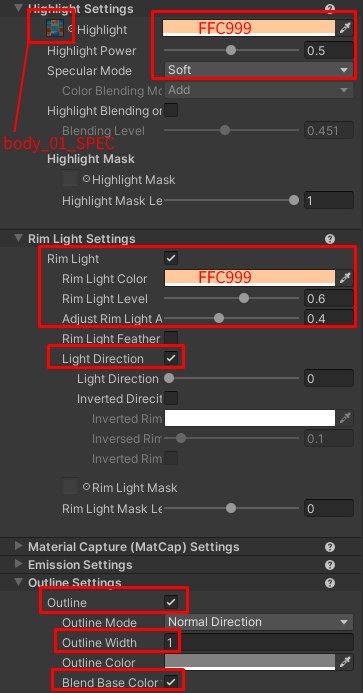
  • Main color → Base Map's Color (Already set by default)
  • Shadow color → 1st Shading map color + Apply to 1st shade map check
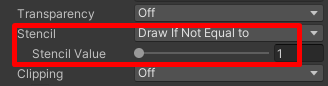
  • Specular Power → Highlight Power (No good conversion ratio. will always look less effective.)
  • Outline Thickness → Outline Width
  • Diffuse map → Base Map (Already set by default)
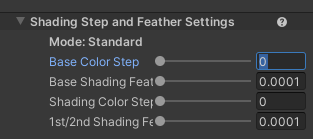
  • Falloff Control Image → Base Color Step(White area %) & Base Shading Feather(Blur area %)
  • Specular / Reflection Mask → Highlight Map(Image) + soft specular mode
  • Normal Map → Normal Map(Image), set to 0.3 + Three Basic Colors check
  • Render Queue → Not required, only change when fixing mat_cheek material.
  • ...and bunch more other changes to mimic the look as much as I could

Such step goes same throughout this post, so I'll skip original material data images.


1. Convert all material's shader to URP/Toon

Select all model materials, change Shader to Universal Render Pipeline > Toon.

Then she would looks like this - We have colors at least.


2. Set All Materials' Base Color Step to 0

For all Materials, under Shading Step and Feather Settings - Set Base Color Step to 0.


IDK why but in my Unity version I can't change all material's variable at once. In that case, do it one by one.

Now default shade color(White) is all gone.


3. Material - body

3.1 Body base setup

1st Shading Map color will be same throughout this post, remember it - CCCCFF


3.2 Separating frontface culling & backface culling

Now we'll have to divide this as Rim Light makes double-sided flat material bright even if it shouldn't - like hairband and skirts.

Duplicate body material, we'll make each material only deal with Front and Back side culling. (Culling = Not drawing side)

For Backface Culling material - aka front part (what a confusing name)


For Frontface Culling material - aka back part

We're essentially separating Frontface and Backface of the double sided material, and disabling Rim Light on one of it.


3.3 Duplicating material to give different Rim Light & Highlight

Now, copy all 3 body materials again. and add name 'blue' for each of them.

We'll use this to give blue Rim Light / Highlight to blue cloth parts - and previous 3 as orange.

For this new 3, set color as following(except rimlight color for frontface culling)


3.4 Applying materials

Now Expand prefab instance > mesh_root > and set materials as following:

Some will need to expand materials slot to put two.


I think we could've saved 2 materials by unifying all with separated backface & frontface culling materials.


4. Material - eye_L1 / eye_R1

Also turn off outline, if active.

You might want to play with shading or emission settings, depending on what you prefer.

If you light lit eye in darkeness - set Base Color Step to 0.


Rimlight is optional - will only be visible in extreme angle.

Eye Rimlight in action


With Stencil you can make eye visible over hair.

Remember we set Stencil value to 1 - This will later be used on hair.


Do same for both eye materials.


5. Material - mat_cheek

Also turn off outline, if active.

Reason for Auto value + 1 is, without that rendering order get messed up depending on angle like following.

mat_cheek material hiding part of right eye

So we're giving mat_cheek a bit lower priority in rendering queue, to make sure eye get drawn first - not vice versa.


If set to somewhat far from Auto value - this might happen:

hair overlapping to grid


6. Material - eyebase

Also turn off outline, if active.

eyebase also gets the stencil, so set accordingly.


7. Material - eyeline

Also turn off outline, if active.

Stencil here too!


8. Material - face


9. Material - skin

10. Material - hair

10.1 Hair base


10.2 Separating backside & frontside culling

Just like with body, duplicate, set one as backface culling, other as frontface culling, and disable Rim Light on frontface culling material.


10.3 Duplicating to create stencil materials

This time copying backface / frontface culling materials only.

And set following for 2 of new materials.


10.4 Applying Materials


Stencil will allow eyes to be visible through front side hair.

Do note that if Transparency is on - stencil does not work.


11. Done

Finally we converted a unity-chan. Not as great as it used to be, but still - quite usable.

Unity 2022.1.7f1 - with Global Volume


Further reading:


GitHub - Unity-Technologies/com.unity.toonshader: Unity Toon Shader ( in progress )

Unity Toon Shader ( in progress ). Contribute to Unity-Technologies/com.unity.toonshader development by creating an account on GitHub.

github.com


+ Recent posts